Linking Payment Method in Google Ads
1. Sign in to your Google Ads account.
After you are logged in to your gmail search in the google search “Google wallet”

Click on the first option , it better to do it via manually Google Ads payment method search typing instead of direct
url : www.wallet.google – the more searches you doing manually the more trust your browser getting.
2. Navigate to the Billing Section:
Click on the “Billing” icon, typically found in the top navigation bar or in the left-side navigation menu.

3. Access Payment Methods:
From the Billing section, click on “Payment Method”.
4. Add a new payment method:

* Click “Add payment method”.
* Select the type of payment method you want to add (e.g., credit card, debit card).
* Enter your payment details, such as card number, expiration date, and billing address.
* Agree to the Google Ads Terms and Conditions.
* Click “Save” to finalize the addition.

5. Set a primary payment method:
If you want to use automatic payments, you’ll need to designate one of your payment methods as the primary method. You can do this by clicking on the “Other” dropdown menu in the lower left corner and selecting “Primary”.
6. Add a backup payment method:
It’s recommended Google Ads account services to add a backup payment method to ensure your ads continue running even if there’s an issue with your primary payment method. Follow the steps outlined above to add a new payment method, and then designate it as the backup.


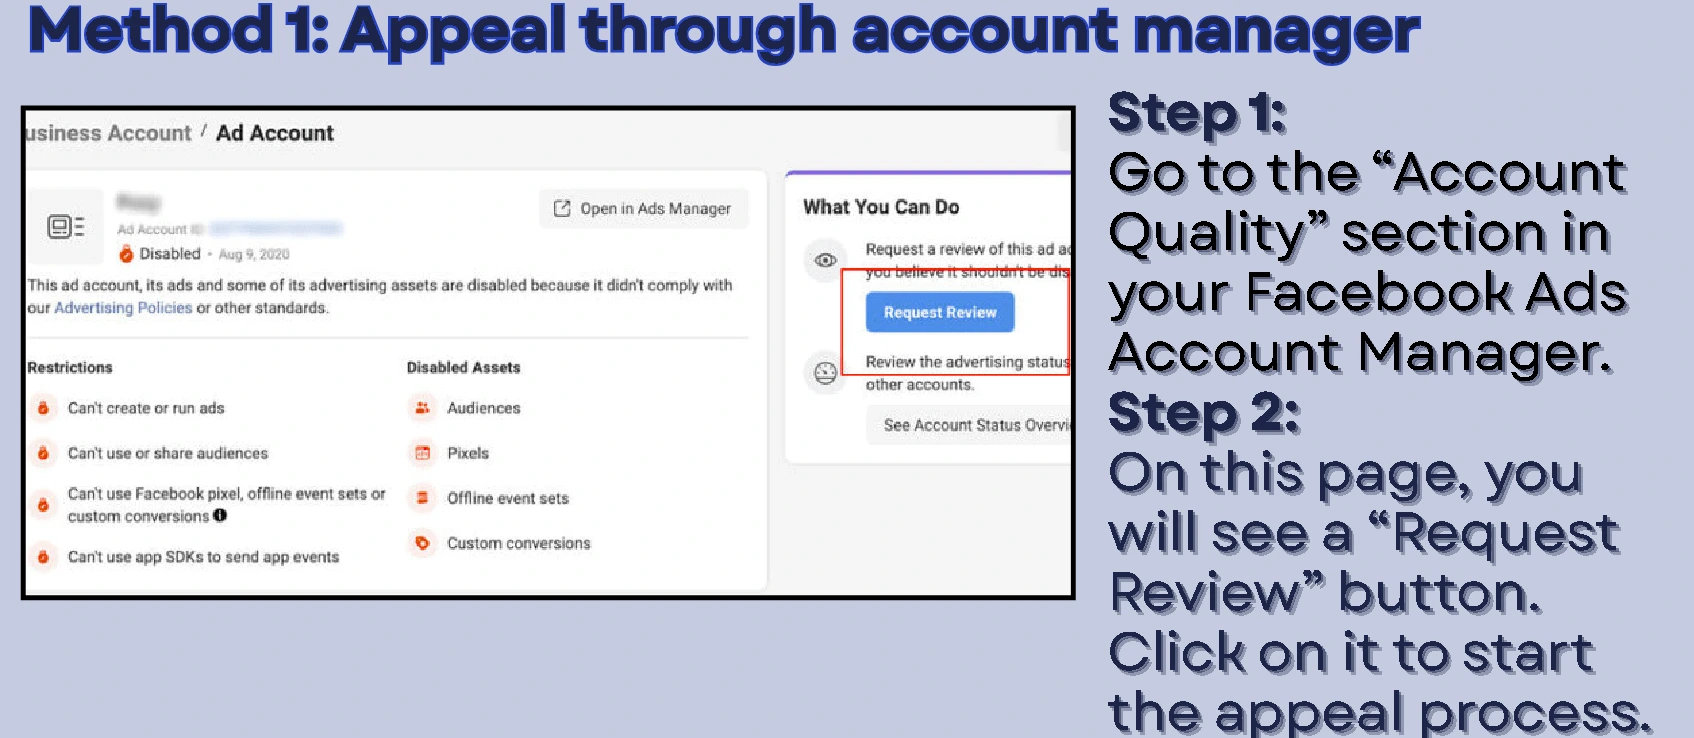


 Go to the Account Quality Center (